Automotive rust is the ultimate silent enemy of vehicle longevity. For decades, iron oxide has plagued car owners, slowly degrading structural integrity and diminishing resale value. Rust occurs when the iron elements in steel react with oxygen and moisture, a chemical process accelerated by road salt, humidity, and environmental debris. Once it takes hold, rust spreads dynamically beneath the paint layer, meaning what appears to be a minor blemish on the surface often hints at more extensive oxidation below.
Effectively tackling rust requires a firm understanding of its different stages, the proper mechanical processes for eradication, and the patience to execute repairs seamlessly. Neglecting rust ensures that a minor paint bubble today will inevitably become a gaping structural hole tomorrow. This comprehensive guide outlines the methodologies, tools, and technical procedures required to perform successful rust remediation in a home garage.
Understanding the Three Stages of Automotive Rust
Before grabbing any grinding tools or sandpaper, you must evaluate the severity of the damage. Automotive rust is categorized into three distinct phases, each requiring a progressively aggressive repair strategy.
1. Surface Rust
Surface rust represents the earliest and most manageable stage of oxidation. It typically occurs when a stray rock chip, deep scratch, or environmental abrasion penetrates the clear coat and color layers, exposing the bare sheet metal underneath to atmospheric moisture. At this stage, the oxidation is strictly confined to the topmost microscopic layers of the metal panel. The structure remains perfectly rigid, and there is no bubbling or flaking of the surrounding paint.
2. Scale Rust
If surface rust is left unaddressed, the chemical reaction penetrates deeper into the steel matrix, leading to scale rust. At this phase, the iron oxide begins to expand, causing the surrounding paint to bubble, crack, and flake away from the body panel. The surface becomes noticeably rough, pitted, and covered in loose, scale-like flakes of corroded metal. While the base metal is still structurally sound enough to save without cutting, the repairs require significant mechanical abrasion to reach clean steel.
3. Penetrating Rust
Penetrating rust is the terminal phase of vehicle oxidation. Over time, scale rust completely consumes the base sheet metal, converting solid steel into brittle iron oxide that eventually crumbles away. This results in visible holes, compromised panel seams, and structurally unsafe framing components. Penetrating rust cannot be sanded or chemically converted away; the only viable solution is complete mechanical excavation of the rotten material followed by welding in fresh metal replacement panels.
Essential Tools and Safety Equipment
Executing a professional-grade rust repair requires assembling a specific suite of tools before starting the project. Cutting corners on prep work or safety gear will only result in an uneven finish or personal injury.
Ensure you have the following gear prepared in your workspace:
-
Personal Safety Gear: A high-efficiency particulate air respirator mask is non-negotiable to protect your lungs from toxic paint dust and airborne metal particles. You will also require tight-fitting safety goggles and heavy-duty work gloves.
-
Abrasive Tools: An electric angle grinder fitted with a poly-strip disc or a dual-action orbital sander is ideal for rapid material removal. You will also need manual sanding blocks accompanied by various grits of sandpaper (specifically eighty-grit for heavy shaping, and three hundred and twenty down to one thousand-grit for fine paint blending).
-
Chemical Treatment and Fillers: A high-quality chemical rust converter or metal conditioner, standard two-part polyester body filler, and an automotive fiberglass repair kit if minor structural reinforcement is needed.
-
Refinishing Supplies: An etching primer, high-build sandable primer, factory-matched color base coat, and an automotive-grade two-part polyurethane clear coat.
Step-by-Step Guide to Surface and Scale Rust Repair
For vehicles suffering from surface or scale rust, the following systematic protocol will eliminate the oxidation and restore the factory paint profile.
Step 1: Isolating the Work Zone
Thoroughly wash the entire vehicle to eliminate road film, grease, and wax contaminants that could be ground into the bare metal. Once dry, use heavy-duty masking paper and painter tape to isolate the damaged panel completely. Overspray from primers and clear coats travels far, so be sure to mask off adjacent panels, trim pieces, and glass surfaces far beyond the immediate repair site.
Step 2: Grinding and Stripping to Bare Metal
Using an angle grinder equipped with a poly-strip wheel or eighty-grit sandpaper on a sander, begin removing the compromised paint and loose rust. You must expand your grinding zone roughly one to two inches past the visible perimeter of the rust spot.
-
The Goal: Continue stripping the area until you reach bright, gleaming, unpitted bare steel.
-
Crucial Note: If you leave even a single microscopic speck of dark, oxidized rust pitting inside the steel pores, the chemical reaction will resume beneath your new paint, causing the repair to fail within a year.
Step 3: Chemical Neutralization
Once the metal is stripped, apply a thin coat of chemical rust converter or phosphoric acid metal conditioner to the bare steel using a clean brush. This chemical solution transforms any invisible trace remnants of iron oxide into a stable, black iron phosphate compound. Allow the converter to cure fully according to the manufacturer specifications, then wipe the surface down thoroughly with a dedicated wax and grease remover solvent.
Step 4: Applying and Shaping Body Filler
If the scale rust left behind minor depressions or pitting in the steel surface, you must restore the original contours using a two-part polyester body filler.
-
Mix the filler and hardener paste precisely according to the directions.
-
Apply the mixture across the repair zone using a flexible plastic spreader, pressing firmly to eliminate air pockets.
-
Once cured, use eighty-grit sandpaper to rough-shape the filler, gradually transitioning to one hundred and eighty-grit and three hundred and twenty-grit paper until the patch is completely level and seamlessly flush with the surrounding original sheet metal.
Step 5: Priming the Surface
Wipe away all sanding dust. Apply three light, even coats of self-etching primer to the bare metal zones, allowing five to ten minutes of flash time between layers. The acid components in etching primer bite directly into the steel for optimal adhesion. Next, apply two coats of high-build sandable primer over the entire repair site. Once fully dried, wet-sand the primer layer with six hundred-grit paper until the texture feels smooth to the touch.
Step 6: Base Color and Clear Coat Application
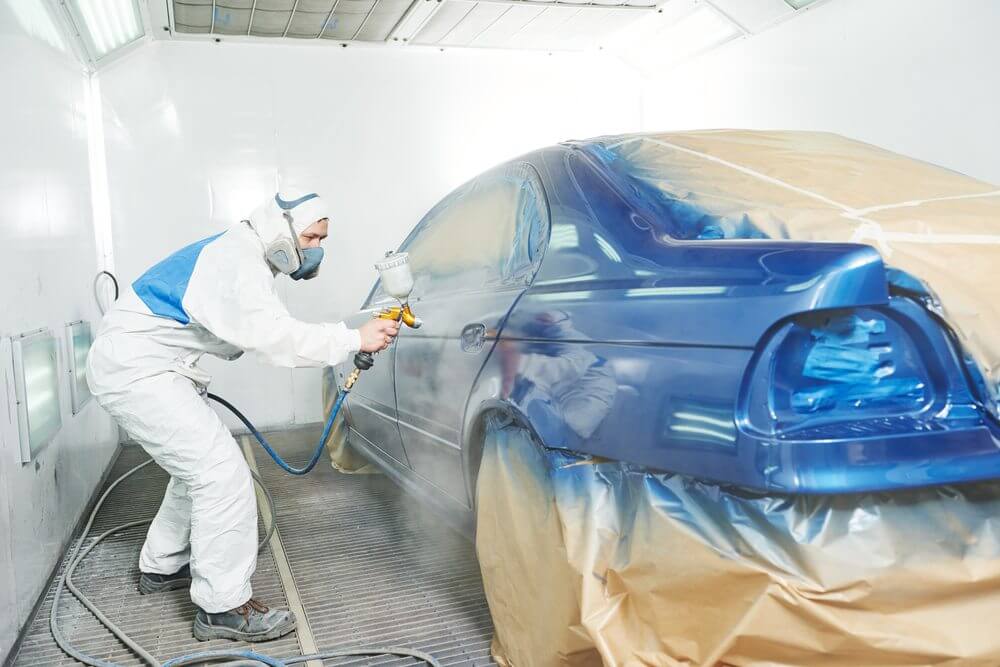
Wipe the surface clean. Apply the factory-matched color base coat in smooth, overlapping horizontal strokes. Avoid trying to achieve full coverage on the first pass; use three to four light coats, blending the paint outward into the original factory color layer. Finally, apply two to three layers of a high-quality two-part clear coat to restore gloss protection. Allow the clear coat to cure for forty-eight hours before utilizing a fine polishing compound to eliminate any minor orange peel texture and achieve a seamless mirror finish.
Addressing Penetrating Rust: The Advanced Approach
When rust has completely breached the sheet metal, leaving behind structural holes, standard body filler will not suffice. Body filler absorbs atmospheric moisture from the backside, meaning applying it over an open hole will result in rapid failure.
The only permanent remedy for penetrating rust requires the physical removal of the decayed panel sections:
-
Excavation: A rotary cutting tool or metal shears must be used to slice out the entire rusted area, cutting back until solid, full-thickness metal is reached.
-
Patch Fabrication: A replacement patch panel must be carefully shaped from fresh galvanized sheet metal of the exact same gauge thickness.
-
Integration: This new patch is either precision patch-welded into place using a MIG welder or structurally bonded using specialized automotive panel-bonding structural adhesives.
-
Finishing: The joining seams are then ground down flush, smooth-finished with a thin layer of body filler, primed, and painted following standard refinishing practices.
Proactive Rust Prevention Strategies
The most efficient way to manage automotive rust is to stop it from forming in the first place. Incorporating a few simple preventative maintenance habits can preserve a vehicle body indefinitely.
-
Regular Undercarriage Flushes: During winter months, wash the vehicle undercarriage weekly to remove accumulated road salts and de-icing chemicals. Pay special attention to the inner lip of the wheel wells, rocker panels, and fender bottoms where damp salt sludge gathers.
-
Keep Drain Holes Clear: Automobile doors, rocker panels, and quarter panels feature tiny mechanical drain holes at their lowest points to allow internal condensation to escape. Periodically check these holes with a thin wire to ensure they are not clogged with leaves or road grime, which traps water inside the body cavities.
-
Apply Undercoating Waxes: Utilize high-quality, oil-based or cavity-wax rust prevention sprays. These specialized products crawl into interior body seams, displacing moisture and creating a durable, self-healing barrier that shields bare metal from oxygen contact. Avoid hard rubberized undercoatings on older cars, as they can crack over time, trapping moisture directly against the steel frame and accelerating hidden rust growth.
Frequently Asked Questions
Can I use standard spray paint from a local hardware store to finish my rust repair?
No, standard hardware store spray paints are not formulated to withstand the harsh environment an automobile experiences. Consumer spray paints utilize simple enamel bases that lack resistance to ultraviolet radiation, stone chips, road chemicals, and spilled gasoline. To achieve a durable repair, you must utilize automotive-grade base coats and specialized two-part polyurethane clear coats that feature an internal chemical activator button to provide a hardened, weather-resistant finish.
Why does rust often reappear around the edges of a repair area after a few months?
Rust usually returns because the technician failed to expand their original grinding zone far enough past the visible damage site. Microscopic rust spores can travel beneath apparently healthy paint layers, remaining completely invisible to the eye. If these trace elements are not entirely ground away down to pristine, bare steel or neutralized completely with a dedicated acid converter, the oxidation process will continue to expand underneath the new primer layer.
Is it safe to use fiberglass mesh to repair large rust holes in a vehicle frame?
No, it is highly unsafe to use fiberglass mesh or body filler to repair rust holes located on structural frame rails, suspension mounting points, or structural pillars. Fiberglass and body filler possess zero structural or load-bearing strength. If a structural component is compromised by penetrating rust, it weakens the vehicle crumple zone dynamics during a collision, making it mandatory to have the section repaired via professional steel welding or complete component replacement.
How can I find the exact factory color code to match the paint on my vehicle?
Automakers print the exact paint color code on a dedicated vehicle information sticker located within the driver-side door jamb, under the front hood near the radiator shroud, or inside the glove box compartment. This alphanumeric code can be provided to an automotive paint supply store or an online OEM paint distributor to mix an exact aerosol or spray-gun match that accounts for the specific factory metallic flakes and color hues.
What is the purpose of wet-sanding, and how does it differ from dry-sanding?
Wet-sanding involves using specialized waterproof sandpaper while continuously lubricating the metal surface with water mixed with a tiny drop of dish soap. The water washes away the microscopic paint dust particles, preventing the sandpaper grit from clogging up and causing deep, unmanageable gouges in the finish. Wet-sanding is reserved for the final stages of priming and clear coat finishing to create an incredibly smooth, mirror-like transition between panels.
Will a commercial electronic rust inhibitor device protect my car from body oxidation?
No, scientific testing has shown that electronic or cathodic rust protection devices offer virtually no practical benefit for standard road vehicles. While cathodic protection systems are highly effective for large marine vessels or buried steel pipelines that are continuously submerged in salt water or damp earth, they do not function on a road vehicle because air does not provide the continuous, highly conductive electrical circuit required for the system to transfer electrons and prevent oxidation.